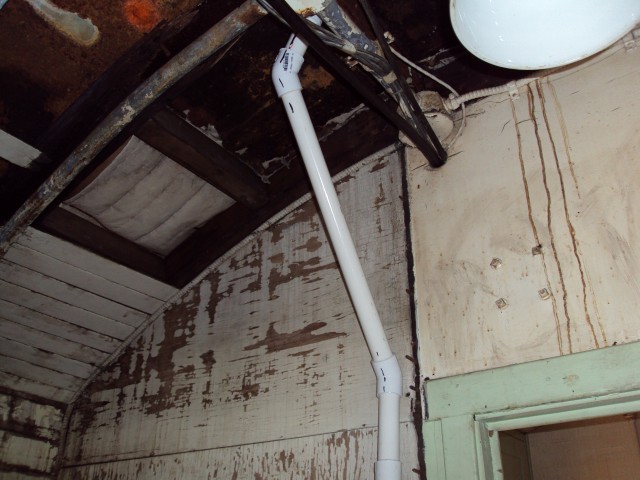
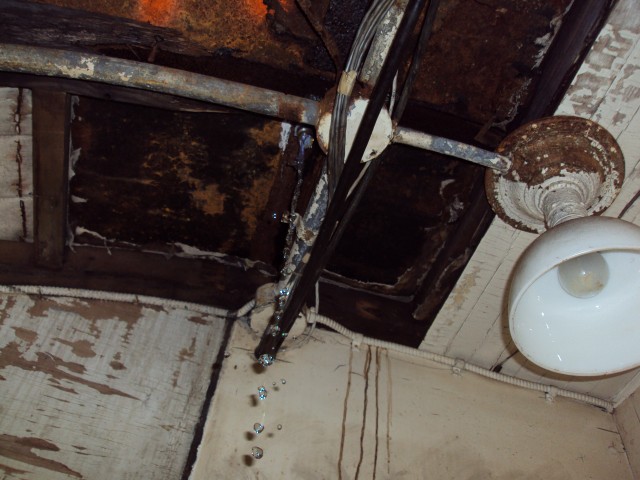
I have combined two weekends worth of work by Chuck Trabert into one blog post.
Chuck Trabert single handedly installed a roof drain above the front closet these past two weekends, 9/1 and 9/9/12. Ever since the Milwaukee Shops added the A/C duct (late 1960’s) which runs length-wise and about 14″ off the car centerline, water has been leaking in the car at some level. The A/C duct forms a natural trough where water can pool and eventually leak in the car. We have sealed the duct well, but pooling water is not a good solution. Water leaking destroyed one plywood wall of the front closet and damaged the interior roof boards.
Here is Chuck’s proposed plan for the roof drain (8/30/12):
I hope to get this installed Saturday as it might not rain. I thought about possible ice damage and decided to tap a 3 or 4″ 3/4″ ( instead of 1/2″) galvanized pipe nipple thru the angle iron to the surface. On top of that I will cement in a stainless screen to keep debris out. Below, immediately transition to 1-1/4″ PVC drain pipe. This way, the constriction will be the 3/4 pipe and being short, should allow any ice block to squirt out either end rather than break the pipe. The larger PVC should allow plenty of room for any ice without damage. This pipe will go straight down, or can jog as necessary to go thru the floor.
Do you know the construction of the floor? Can I drill thru it with a hole saw, or is there maybe some concrete in there? It might be thicker than a hole saw can handle, so I might have to use drills and Sawzall.
Can the pipe go straight down, or is there a door there to the closet that needs to be rebuilt? I don’t remember what that looked like. Do you have any photos that might help? I can also just cap the 3/4 pipe and we can do the PVC part later if need be.
Update from 9/1/12:
First thing when we got there Saturday was a 1.5 hr rainstorm. Used that time to finish attaching the ceiling and light over the board. It took the rest of the day to drain the lake and drill and tap the angle iron and install the pipe nipple. I capped it for now. Will be going back next weekend sometime to hopefully finish the plumbing. Did not even look at going thru the floor. That will be an adventure of its own.
Update from 9/9/12:
It was a beautiful day out there yesterday. I was able to locate a very convenient place to drill thru the floor so the pipe comes out behind the propane tank cage and next to the air tank in the center. I was able to jog the pipe up top so it will be easy to rebuild the closet wall around it. Pauline will be sending pictures. The roof lake issue is now solved, until the car gets parked on a slope in the other direction.
I caulked everything I could find on the roof that looked suspect, so we should be good for the winter. The last two times I was there and it poured rain, I did not see any leaks in the area under the expansion tank. I am confident we are water tight for now.
I also stabilized the light and conduit in the hall by the desk. That whole mess was about to crash down. They are only attached to the ceiling boards, not the carlines. The nails holding the boards rusted out so the whole ceiling needs to be reattached. This will be a 2 person job.
Pauline (Trabert) was nice enough to clean up my mess while I finished up on the roof. I did not have time to secure anything, so I wouldn’t recommend moving the car unless you can do that.


