July 15, 2012 Update…

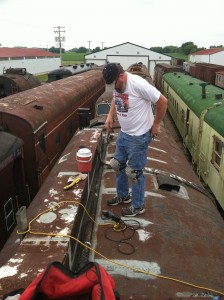
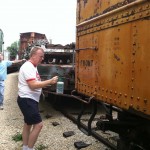
The following work was done on 7/15/12 by Chuck Trabert, Buzz Morrisette and Warren Newhauser:
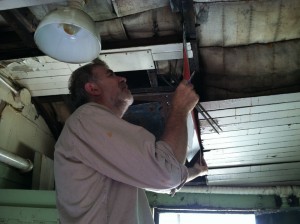
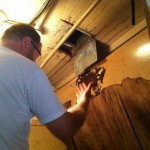
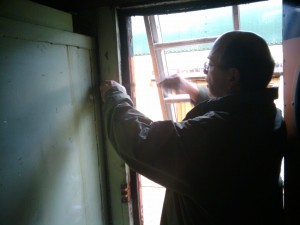
Buzz measuring the carline profile for cutting replacement boards (called stringers) to attach ceiling to.

Pictures are here: https://www.dropbox.com/sh/bz68n0yccgjqprl/eaxHuYVMBG?m

Warren

  • Troubleshooting Waukesha control panel as to why the 3 minute pulses to the auto-starting wheel are not working
  • Tested the 5 sec N.C. time delay relay working ok.
  • Found the 3 minute N.O. quick make/slow break time delay relay not functioning. Seems it is only working very intermittently. The relay is sealed and there are no serviceable parts on the relay contacts.
  • Cleaned reverse current holdout relay contacts. I have suspected these are dirty and causing improper operation where Enginator would constantly cycle on/off.
  • Sprayed upper sides of car with Captain Lee’s Metal prep solution to stop the rust and put temp zinc phosphate coating to stop rust.

Chuck

  • Sealed A/C duct seem on rear of car roof with Vulkem caulk.
  • Researched putting in roof drain. After a few hours determined there is a structural piece running at the exact offset from the centerline where the pipe flange would mount inside.
  • Agreed Chuck would run a 3/8″ pipe through the structural angle iron on the ceiling to get to the roof.

Buzz

  • Measured profile for curved carline boards that the tounge & groove ceiling gets nailed to. Has access to free wood.


Chuck/Warren

  • Lowered coolant level from totally full to about 1 1/2″ below top. Coolant no longer overflows when run in hot weather after running. Ambient temp ~95 degrees.
  • Measured operating temp at cylinder head at 177 deg. with infrared temp gun to verify engine was not overheating. Thank you for the great advice John Grube!!
  • Changed oil to Mobil One 10w-30. Oil had not been changed in probably 30 years!! This could be perhaps the last oil change it will need.
  • Oil filter purchased last Fall was incorrect. Filter dims are 5″ tall by 4″ diam. (Napa 801 or 1108)
  • Adjusted fuel pressure down from 6 oz to 3 oz.
  • Tightened fan belt
  • Installed grease fitting on fan pulley bearing and greased pulley
  • Turned water pump grease cap 1/2 turn
  • Blew out radiator and generator brushes/commutator with compressed air. Moderate amount of dirt present
  • Blew out dirt/dust from underneath car
  • Chuck was unable to adjust oil pressure down from 40 psi. Chuck was not able to get adjusting screw beneath the carb to move
  • Removed cover from oil pressure sending unit. Was able to test it was at 0 ohms with no pressure (correct). Need to test with engine running to make sure it opens the circuit up.
  • Removed cover from temp sending unit. This we know does not work from applying heat and seeing the contacts do not close. We do not have an exact replacement unit so we may have attempt fixing or use a slightly different unit.
  • Pumped about 14 gallons of water into the kitchen water tanks. Had to shut off the valves to the water heater, the large kitchen tanks and sub-cooler. We can now wash our hands and the end of of a long sweaty day!!


Items Remaining on Enginator:

  1. purchase new Napa 801/1108 cartridge oil filter
  2. lubricate magneto cam
  3. finish testing oil pressure sending unit when running
  4. finish temp sending unit and test
  5. check generator bearing and lube if nec.
  6. check engine valve adjustments
  7. clean carb throat
  8. clean oil bath air cleaner
  9. replace spark plugs

WE NEED VOLUNTEERS!!! If you would like to explore helping with the restoration of the Milwaukee Road Dyanamometer car please contact wanewhauser2004@yahoo.com.

 

Posted in X-5000 | Comments Off on July 15, 2012 Update…

2011 Season Restoration Summary – 12-18-11

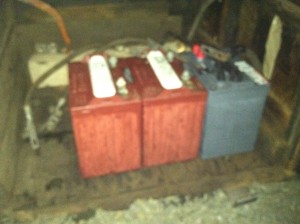
It is a balmy damp day at IRM. As I get ready for the final day of work this year, mainly to remove the cars’s golf car batteries, I

Batteries Being Removed for Winter

hear a constant dripping sound from the cars in Yard 10. Strange because it’s not raining out. Turns out it must be the condensation caused by the fact that temperature of the cars are below the dew point and thus they are condensing moisture. I realized that this type of condensation is probably quite common causing a lot of exterior damage to the equipment stored outside.

We started out the 2011 season with the objective of getting the roof sandblasted and painted.  The last few years, track repairs at Barn 3 have made this impossible. This year was no exception. One of the tracks in Barn 3 had started to lean early in the season. The entire track had to be rebuilt which meant there was nowhere to put the Dyno for sandblasting.  We continued working on sealing minor leaks on the roof in the mean time.  However, towards the beginning of October, we got word that John Grube was coming back to Milwaukee for a few days and would spend one day at IRM with us helping us get the electrical systems working later in the month. What a day it was. With the help of so many volunteers we were able to make quantum progress with the Enginator, Motor-Alternator and other systems that had been elusive for many years. The kind of experience John has simply is no longer readily available.

Thank you to Chuck Trabert, Larry Kuehn, Gary Olson, John Grube, Buzz Morisette, Mike Baksic, Phil Stepek and my family for making 2011 year of a record progress.  The video link below shows our major accomplishment for 2011, the Waukesha Enginator finally works after many man-days of effort by our volunteers.

Starting the Waukesha Enginator


Posted in X-5000 | Comments Off on 2011 Season Restoration Summary – 12-18-11

The Waukesha ‘Enginator’ – Intro to ‘Carbon Pile’ Voltage Regulator Technology – 11/19/11

At this point the ‘Enginator’ was working, but there was still one major obstacle to be fixed. The carbon pile voltage regulator was not working. It was ‘stuck on full’ charging the batteries at 168 Amps at 44 Volts (for a 32V system). Running the Enginator would ruin the 4 8V golf car batteries in very short order.

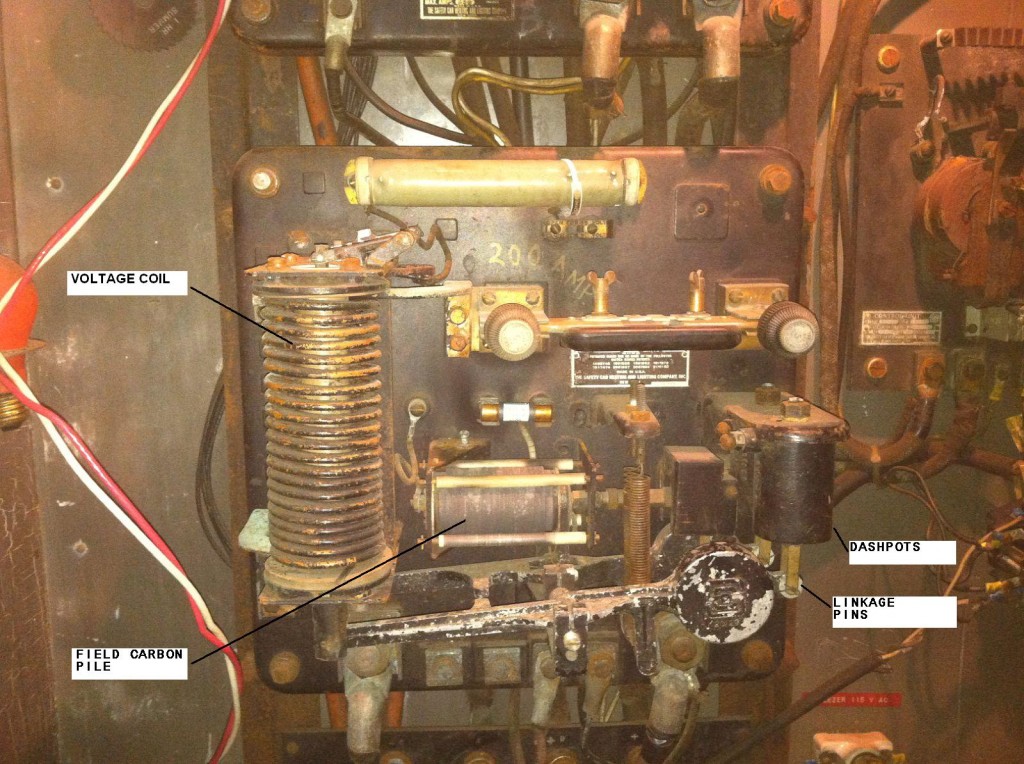
Safety Car Heating & Lighting Company Carbon Pile Regulator (annotated by John Grube)

A month earlier when John Grube was out helping us he had noticed that the Safety Car Regulator was frozen up. Its job is to regulate the voltage and current output of the generator by means of a voltage and current coil that through a series of levers compress a set of carbon discs (aka carbon pile) which then change resistance and regulate the current to the generator field which, of course, controls generator output.  John did a bit of research and found that Eric Hopp, a fellow rail had published the voltage regulator manuals on his site (http://erixrailcar.com/techpubs). This gave us a pretty good idea of the operation of the voltage regulator, including procedures for adjustment. It is always nice to have manuals for this old equipment! Coincidently, one of our volunteers, Larry Kuehn, noted that the Milwaukee Public Museum had a new exhibit from Allen-Bradley featuring carbon pile regulators.

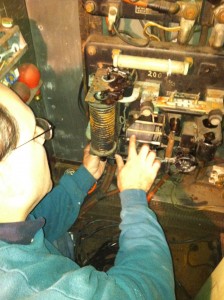
John reviewed the manuals and suggested we take apart the linkages and make sure they operate freely.  

Making sure the voltage regulator linkages at the current and voltage coils are moving freely.

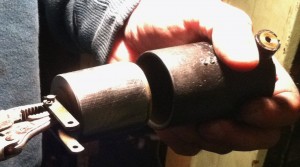
Doing so revealed that one of the dashpots was frozen. The dashpots act as pneumatic dampers to prevent unstable operation. They contain a graphite piston in a brass cylinder with an adjustable screw to adjust how much air is released when the piston is moved up or down.

I was able to use some #400 sandpaper to sand a ridge off the end of one of the cylinders that was causing the piston to bind. It took a couple of attempts to get the piston to move completely freely in the cylinder.

Dashpot showing graphite piston and brass cylinder.

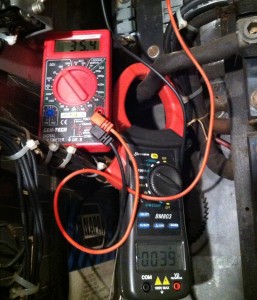
After reassembling the linkages (lightly lubricating them) and dashpots the regulator moved freely! Now it was time to run the generator and see if it was going to work. We started the Enginator and the result is 35.4V and 39A output. Perfect for charging the batteries! This will not overcharge the batteries. Special thanks go to John Grube and Eric Hopp for their collective help in getting the old carbon pile regulator working.

35.4V at 39A output. Perfect!!!


Posted in X-5000 | Comments Off on The Waukesha ‘Enginator’ – Intro to ‘Carbon Pile’ Voltage Regulator Technology – 11/19/11

The Waukesha ‘Enginator’ – Really Getting it Working – Day 5, Friday 11/4/11

After several days of prep work and now getting the ‘Enginator’ running everyone was really excited – we had really accomplished something pretty significant. But, we were sort of “out of available weekends” with our families so we decided to take a day off work (Friday) to come out to IRM.

See this photo album for pictures of the day’s work: Waukesha Enginator Day 4 – 11/04/11.

Larry Kuehn started by resplicing the high current Gen (-) cable underneath the car which was causing the unit not to crank over when the unit was rolled out on its rails for servicing. We spent hours with John Grube tracing circuits a few weeks ago attempting to understand why the unit would not crank.

At this point we were able to get it running by manually holding in the control circuit relay and manually pushing up on the starting contactor. This was great progress, but the starting circuitry was not working.

Meanwhile Chuck Trabert was working on the engine – replacing spark plug clips, filling up the radiator, checking the throttle and governor linkages, checking the operating temperature with an IR non-contact thermometer and other misc. items on the engine, using his abilities as a former mechanic, meanwhile Larry and I were in the electrical locker trying to figure out the starting circuitry. What we ended up doing was to independently test each relay on the control panel. Did the coil energize and did the contacts make/break the connection. Was there continuity from the control panel to the Start/Stop switches on the unit under the car? Did the time delay relays trip after energizing their coils for a specified amount of time?

We were joined by Buzz Morisette for lunch onboard the car. I brought some frozen Ken’s Railroad Chili and heated it up on the old Garland stove that still amazingly works.

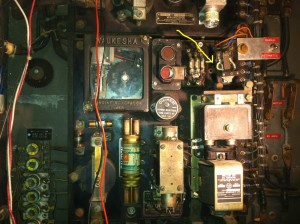
After a couple hours of testing, we finally discovered the starting problem why the starting circuitry was working. The contacts on the Intermittent Starting Relay (shown with yellow arrow) were dirty and thus not making contact. This relay allow the engine to crank for 20 seconds before a thermal trip occurs and breaks the circuit. Cleaning the contacts did the job. The starting circuitry now worked 100%.

Waukesha Enginator Control Panel Showing Intermittent Starting Relay with Dirty Contacts

Now on to the next problem. A pretty big one at that. The S&C Electric “carbon pile” safety regulator for the Enginator was not working. It was stuck full on! My Sinometer new clamp meter showed it charging the batteries at whopping 168A at 44V! The lights were getting very bright and I was getting very nervous about b urning 32V stuff out. . Rather than not run it, earlier in the day we simply disconnected the generator field cable so we could run it without “frying” the batteries. It’s now late in the day and dark outside so there’s no time to work on it. It’s another job for another day.  What great progress today. Everyone was pleased.

How do you troubleshoot a carbon pile regulator? You go ask our friend John Grube who had helped us immensely so far.

Posted in X-5000 | Comments Off on The Waukesha ‘Enginator’ – Really Getting it Working – Day 5, Friday 11/4/11

The Waukesha ‘Enginator’ Finally Runs (sort of)! Day 4, Wed. 10-26-11

On Wednesday Oct. 26, I made a quick run out to IRM to salvage more Waukesha parts from the units that were being scrapped. We had determined that the engine temp and oil pressure sensors were not working and I knew Dave Diamond was close to hauling the old Waukehsa’s away.  My timing was perfect – he was within 10 minutes of driving the old Waukesha’s to the scrap yard when I showed up. He allowed me to salvage some temp and oil pressures sensors that we really needed before leaving.

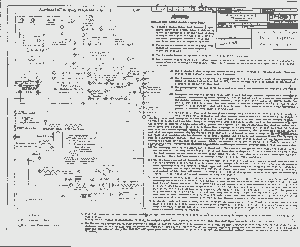
One thing that had been baffling us was the understanding the Waukesha Enginator schematic. especially the starting sequence with all the time delay relays.  By staying up late the past few nights studying the schematic and those in the Waukesha manual I was able begin to understand the unique starting circuitry.

Waukesha 'Enginator' Schematic

In order to get the Enginator started I had to put a piece of paper in the control circuit relay so it would not short out the magneto. This was necessary because the starting relay circuitry was not yet working.

So, having the control circuit relay opened up with a piece of paper, I turned the propane supply on and tried to start by holding  the DC starting contactor up. It began to crank. Took a few tries but it soon started for the first time since the mid-1980’s!! I couldn’t believe it at first because you can barely hear it inside the car.  It was mis-firing and smoking from the oil Chuck put in the cylinders, but it was running!  Without coolant it could only be run very briefly. Unbelievable progress to a fully functioning car!

Click here for pictures and a 27 sec. video (right side of page) of it running.

Continue reading

Posted in X-5000 | Comments Off on The Waukesha ‘Enginator’ Finally Runs (sort of)! Day 4, Wed. 10-26-11

Q. Getting the Waukesha ‘Enginator’ Running – “The Gremlins are in the Ground” – Days 1-3, Oct. 9, 22, 23, 2011

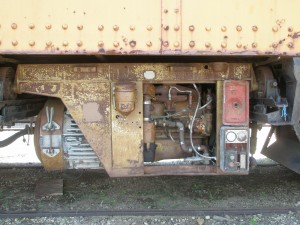
Waukesha 32VDC 7.5kW Propane Enginator. Also seen in picture at top of page.

It has  been a few months since I’ve updated the X-5000 restoration blog.  This time we have many new breakthrough developments to report.

Please see complete pictures online at: http://dyncarx5000.shutterfly.com/pictures

Beginning in early Oct. 2011 we learned that John Grube, a former Milwaukee Shops employee would be coming back to the Midwest from his new home in Boston.  He agreed to spend one day with us at IRM helping us get the electrical/mechanical systems working on the Dyno car.  Those familiar with the Milwaukee Shops know that John’s Father, Jack, was the Supt. of the Passenger Car Shop and responsible for work done to the business cars and Dynamometer.  John followed in his Father’s footsteps, maintaining the business car fleet and Dyno at the Milwaukee Road before starting his own private railcar maintenance company post-Milwaukee Road.  We were elated, as we have not been able to find anyone with the necessary experience in nearly two decades, let alone the experience of working on the Dyno at the Shops. “It’s the easiest car on the whole railroad to work on”, he remarked.  My Father and I dreamed of the day when the Dyno’s systems would come back to life as in it’s former life on the Milwaukee Road. Unfortunately, he did not live to see this materialize.

A week prior to  John’s arrival on Oct 14, we did a complete assessment of the Waukesha Enginator, wanting to maximize the use of his limited time. We found excessive carbon in the combustion chamber, a leaking water pump seal and a slightly leaking flexible propane hose connecting from the car to the Enginator. With 4 8V golf car batteries (32VDC) on board substituting for 4 locomotive batteries, we had tried to start it but to no avail. We were stymied.

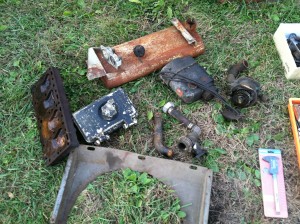
Waukesha Parts Salvaged

Coincidently, at the same time the IRM Coach Dept was scrapping about a half dozen Waukesha units so I spent several hours salvaging parts such as magnetos, water pumps, temp sensors, control box, gauges, mufflers, dylinder head, cover plates, etc. Anything we thought we would need we removed.

Chuck Trabert removed the cylinder head and cleaned it up nicely. Thanks to Eric Hopp’s site http://erixrailcar.com we were able to find the part numbers for the head gasket and water pump seals. Note: for anyone wanting to learn more about Waukesha equipment, Eric has posted the manuals at http://erixrailcar.com/seminars/Waukesha%20Propane.pdf.

I replaced the leaking propane hose with the one from the Ice Engine on the car, rather than spend another $30 for a new flex hose at Home Depot. The trips to the auto store for radiator hoses, antifreeze, spark plugs, seals, gasket material, copper tubing, etc. was getting quite expensive and we didn’t yet know if it would even run or not!

Gary Olson, Larry Kuehn and Buzz Morisette helped roll the Enginator out, trace electrical connection, dragged equipment from the Coach Dept Barn 3 to the Dyno in Yard 10.

“The Gremlins are in the Ground” was quoted to me by Larry, owner of Morton Grove Auto Electric who rebuilt my alternator. When all else fails, he says, it’s probably a bad ground.

After John arrived early Sunday Oct. 24, we spent the day tracing the wiring, applying voltage at the control panel, then measuring it at the generator under the car. At one point, we were not sure we even had the polarity of the batteries correct and could not tell were it not for the fact that the 32V trainline knife switch had the polarity marked.  We thought perhaps had the generator leads mixed up at the terminal block under the car. The Enginator would not crank – until – at the end of the day, after it was dark and the guys had rolled it back it, right before I disconnected the main knife switch, I tried cranking it and it cranked!! We had neglected to check the condition of the generator leads and one of them had a splice that had come loose. Now we were finally making progress!

John also noted that the 32VDC-to-115VAC Motor-Alternator (used to run the instruments, refrigerator, etc. at 115VAC) starting windings seemed to be sticking and it was not switching over to the running windings. This causes excessive current draw where the starting resistor starts glowing and makes a lot of noise.

We documented our efforts online at: http://dyncarx5000.shutterfly.com/pictures.


Posted in X-5000 | Comments Off on Q. Getting the Waukesha ‘Enginator’ Running – “The Gremlins are in the Ground” – Days 1-3, Oct. 9, 22, 23, 2011

X-5000 Work Day 6/18/11

We had a productive work session on June 18, 2011 at IRM.  Chuck Trabert and I checked for persistent roof leaks in three places.

Inspecting and patching the X-5000 roof

There is one major leak through the A/C duct above the middle row of berths that we have been unable to find so far. Even using my iPhone as a video camera up into the duct, we were still unable to find the source of the water.

Chuck thinks he may have fixed it this time after spending a large part of the day on the roof.

There are a couple of very small leaks we marked with fluorescent orange paint (on 5/29/11 while it was raining in the middle of WWII battle reenactments) above the front closet and above the diesel fuel tank for the boiler.

Checking AC duct for moistureI believe the section of the roof above the diesel tank will have to be replaced. It is probably about a two day job for 2 guys.

Note: in each case the leak is no longer causing water damage to the car as we are collecting the water and it is a very small amount.

Meanwhile Larry Kuehn and Gary Olson scraped peeling paint from the sides and applied some phosphoric acid and metal prep to slow down the rusting since it will probably be a while before we paint the sides.

Paint remover testingWe also tried some standard methylene chloride paint remover from Home Depot to see how much work it was to remove the paint from the sides chemically.

Turns out it is a LOT of work. A 2’x2′ square on the side took 20-30 mins with multiple applications of paint remover.  In so doing we discovered the paint history of the car.Old paint revealed on X-5000

The coats of paint are: 1. brown primer, 2. black (with maroon band towards top of car), yellow primer, 3. orange, 4. orange.

Concluding that this paint remover was not a solution, I ordered and received a gallon of Spra Strip paint remover that is supposed to remove several layers of paint at a time (including Imron). We will try it next time out.

I also took back the 3 8V deep cycle golf car batteries and am charging them in my garage and will be testing to see if they are good enough to run the 32VDC electrical system. If these batteries I acquired are good enough, I will have to order one new one to make 32V. Sure would be nice to get the Enginator and electrical systems working this year!

Previous X-5000 roof sealingI need to become a little more pro-active about scheduling work day at IRM to work on the X-5000 since there are more of us involved now. I admit I have been very last minute scheduling up to now but I need to be more proactive.

Below are the weekend dates for July. If you are interested in working could you please let me know what date(s) work for you and hit Reply All and we will schedule it what works for everyone.


July 2/3
July 9/10
July 16/17
July 23/24
July 30/31

Dick Melzer is interested in joining us. His Dad worked on the Dyno before my Dad did and thus has a lot of history with the car. He was an electrician at the Shops and knows woodworking. We need all the help we can get in those areas. We all look forward to meeting you Dick!!

Warren Newhauser–

Posted in X-5000 | Comments Off on X-5000 Work Day 6/18/11

Possible X-5 Builder Photo

The photograph scanned below is from the Chuck Trabert collection and features what could be an actual builder’s photo of the Milwaukee Road Dynamometer car.

Possible Build Photo of X-5000 circa 1930

Click on the Dynamometer image to enlarge

Posted in X-5000 | Comments Off on Possible X-5 Builder Photo

Update from Nov. 21, 2010

Measuring door jamb

Today, we had a record crew of 5 people out to work on car! Gary Olson, Larry Kuehn, Paul (?), Dave (?) and Warren Newhauser showed up on this rainy but warm November Sunday.

Front closet demolition

We got some expertise and a start on replacing the tongue & groove ceiling boards, and we demolished a plywood wall in the front closet to the hallway that was totally rotted out. Bob Kutella kindly showed us the tooling they use in the wood shop to build the ceiling boards to ‘L’ cars.  Dave and Paul also fixed the side door not closing because the bottom sill had rusted and expanded, preventing the door from closing.

Examining ceiling boards in the woodshop

Paul cuts out some sections of the tongue & groove ceiling boards that have rotted due to roof leaks.

Posted in X-5000 | Comments Off on Update from Nov. 21, 2010